Best Practices for Configuring and Using Codex with AGIOne
Codex + CC Switch + AGIOne — AI Coding Setup Guide
A clear step-by-step guide to configure Codex Desktop with CC Switch and AGIOne (agione.pro) API tokens for AI-assisted coding.
Architecture Overview
Codex Desktop (AI coding client)
        │
        │  Requests go through local route
        ▼
CC Switch (local proxy — protocol conversion + provider management)
        │
        │  Forwards to upstream API
        ▼
AGIOne (https://agione.pro/hyperone/xapi/api)
        │
        │  Routes to models
        ▼
DeepSeek / GLM / Gemini / GPT, etc.
Why Routing mode? AGIOne uses Chat Completions protocol, while Codex uses Responses protocol. CC Switch's Routing mode handles the conversion automatically.
Step 1: Download & Install Codex Desktop
- Go to OpenAI's official website and download Codex Desktop.
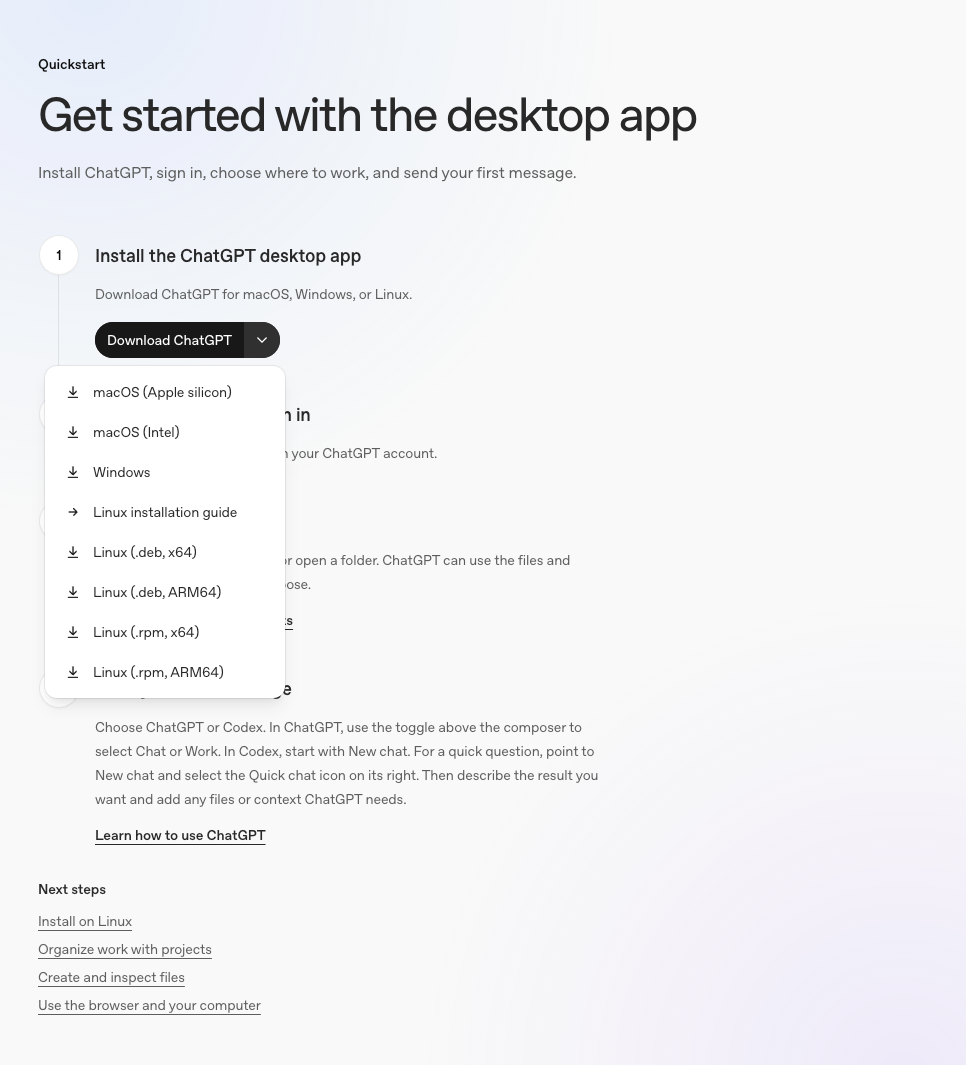
- macOS: `.dmg` file

- Windows: `.exe` installer

- Linux: `.AppImage` or `.deb`
Install and launch Codex.
You may be asked to log in with your OpenAI/ChatGPT account — you can skip this wait cc switch configuration finshed.
Step 2: Download & Install CC Switch
- Go to the official download page: https://ccswitch.io or https://github.com/farion1231/cc-switch/releases
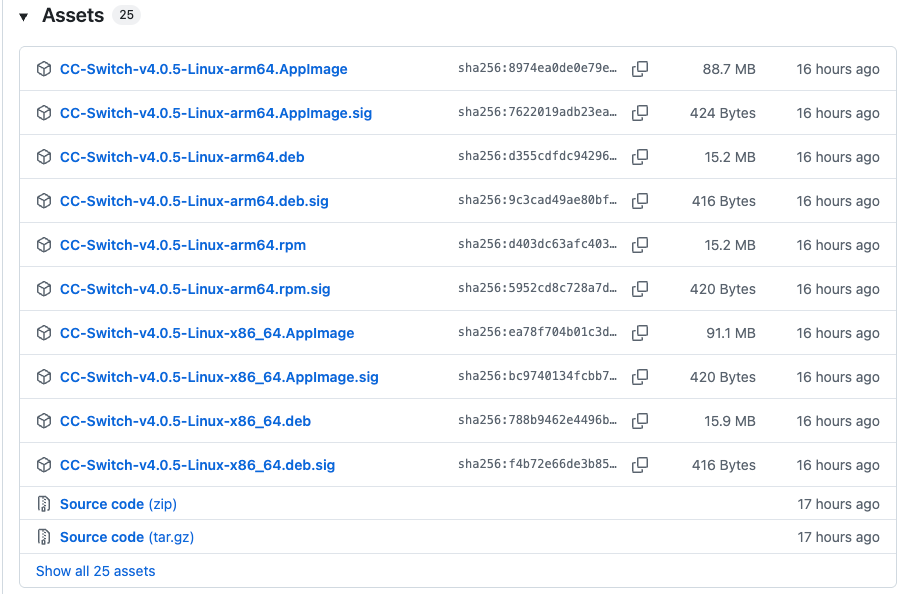
Choose your platform:
macOS (Apple Silicon):
CC-Switch-v4.0.5-mac-aarch64.dmgmacOS (Intel):
CC-Switch-v4.0.5-mac-x64.dmgWindows:
CC-Switch-v4.0.5-win-x64-setup.exeLinux:
.deb,.rpm, or.AppImage
Install and launch the CC Switch.
Step 3: Access AGIOne & Get API Key
Open your browser and go to https://agione.pro** or your private agione platform.**
Log in or create an account.
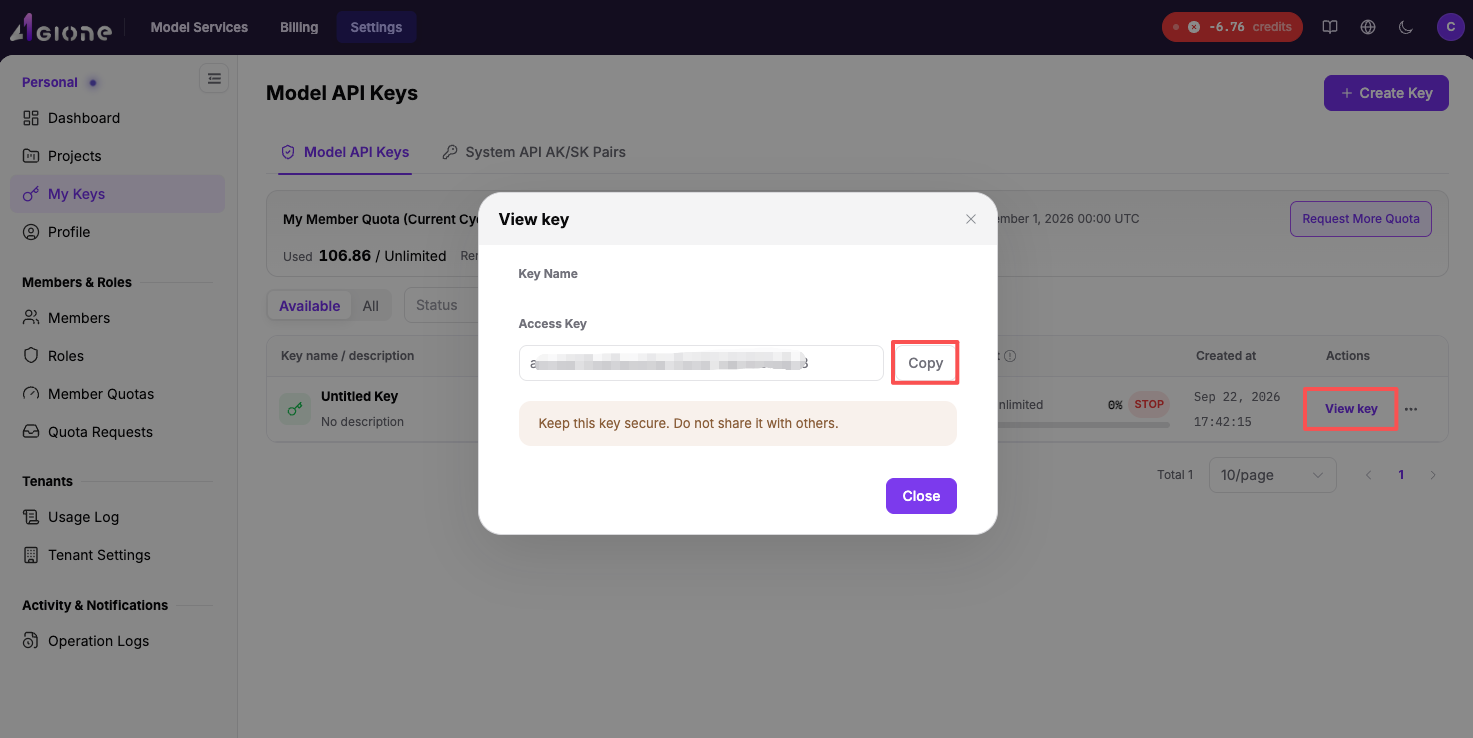
Once logged in, go to Settings , My Keys to Model API Keys.
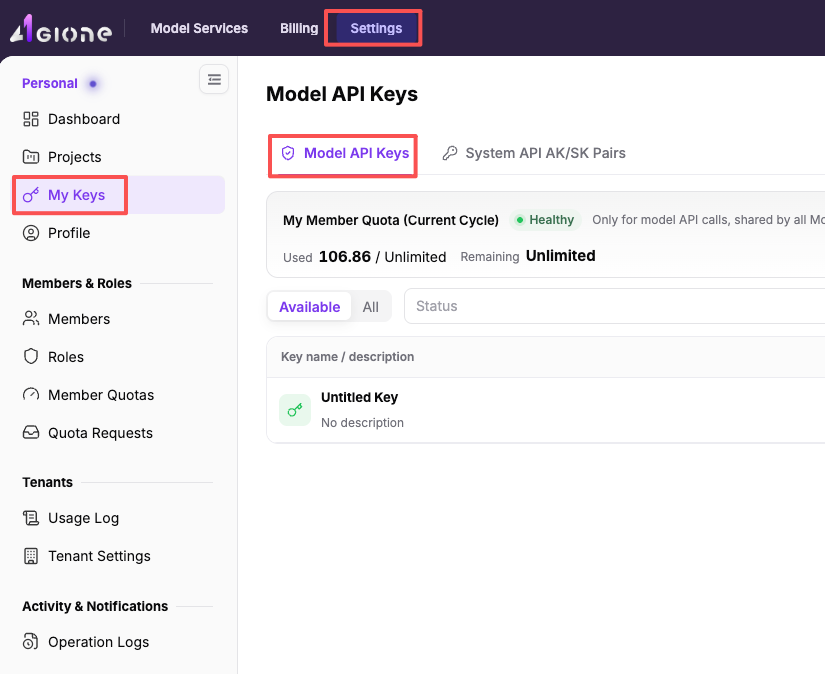
- Click Create API Key (or + Create).
- Give it a name (e.g.,
codex-cc-switch)
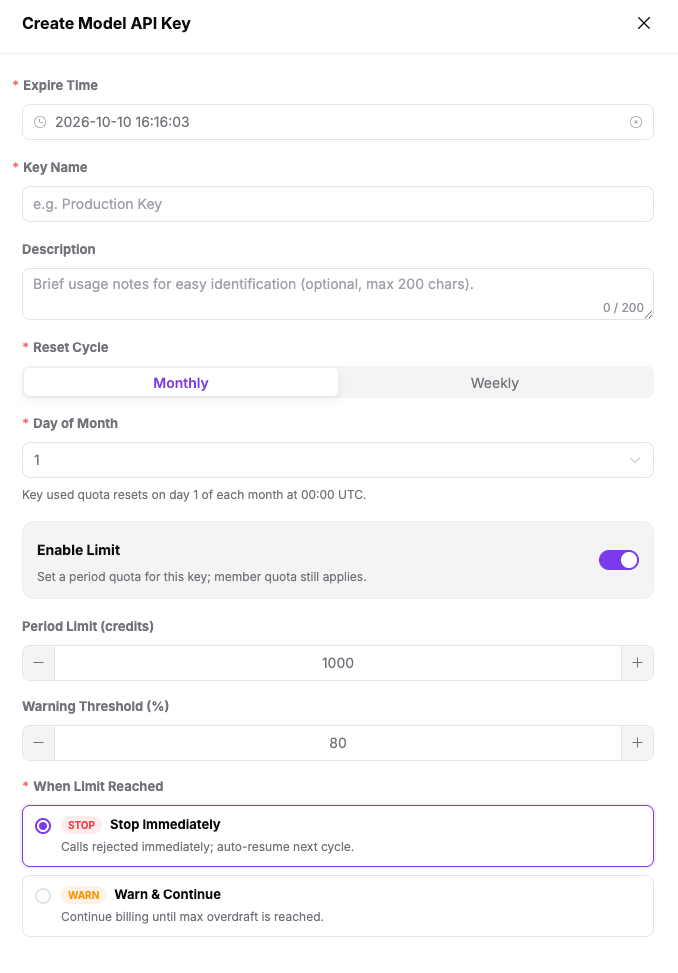
- Copy the generated key — it starts with
ak-and is only shown once.
Step 4: Find Your Model Info
- In AGIOne, go to Model Services in the top menu.
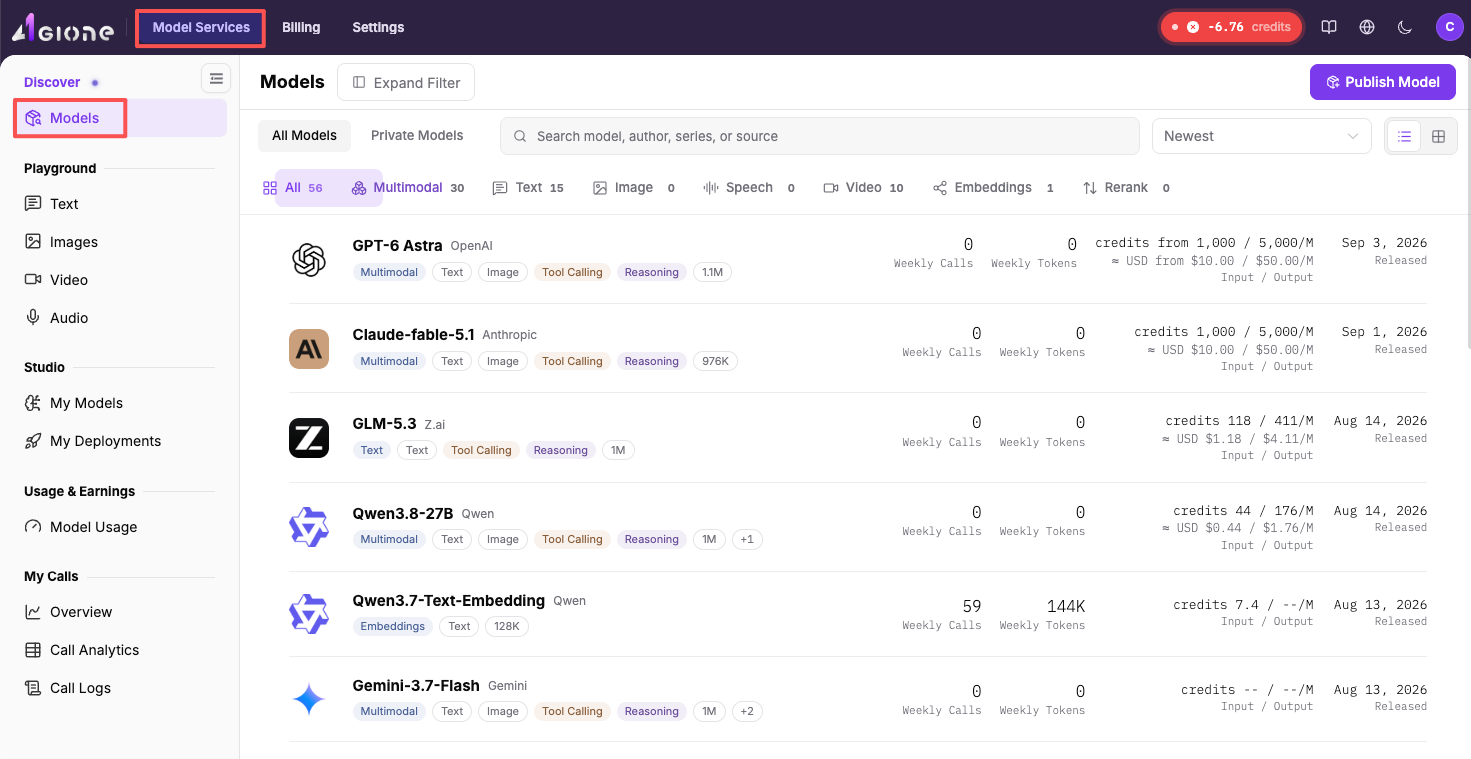
Find the model you want to use. Examples:
- DeepSeek-V4-Flash:
deepseek/deepseek-v4-flash/02acd— fast, low cost, good for daily coding
- DeepSeek-V4-Flash:
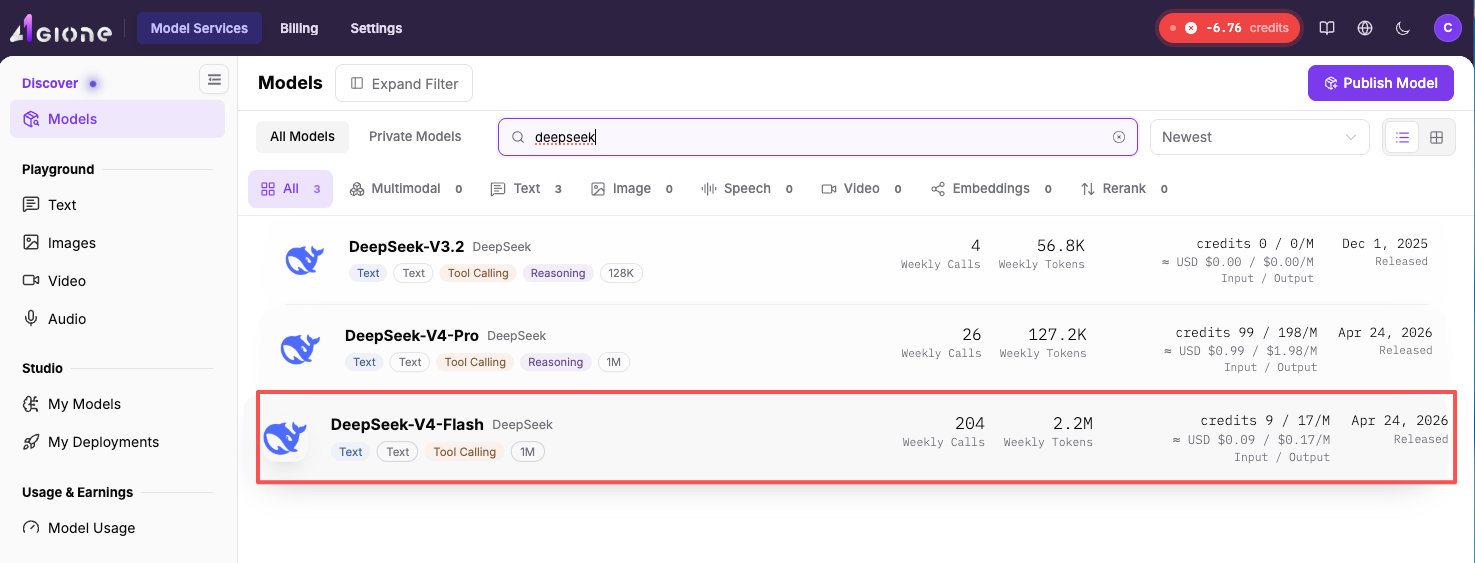
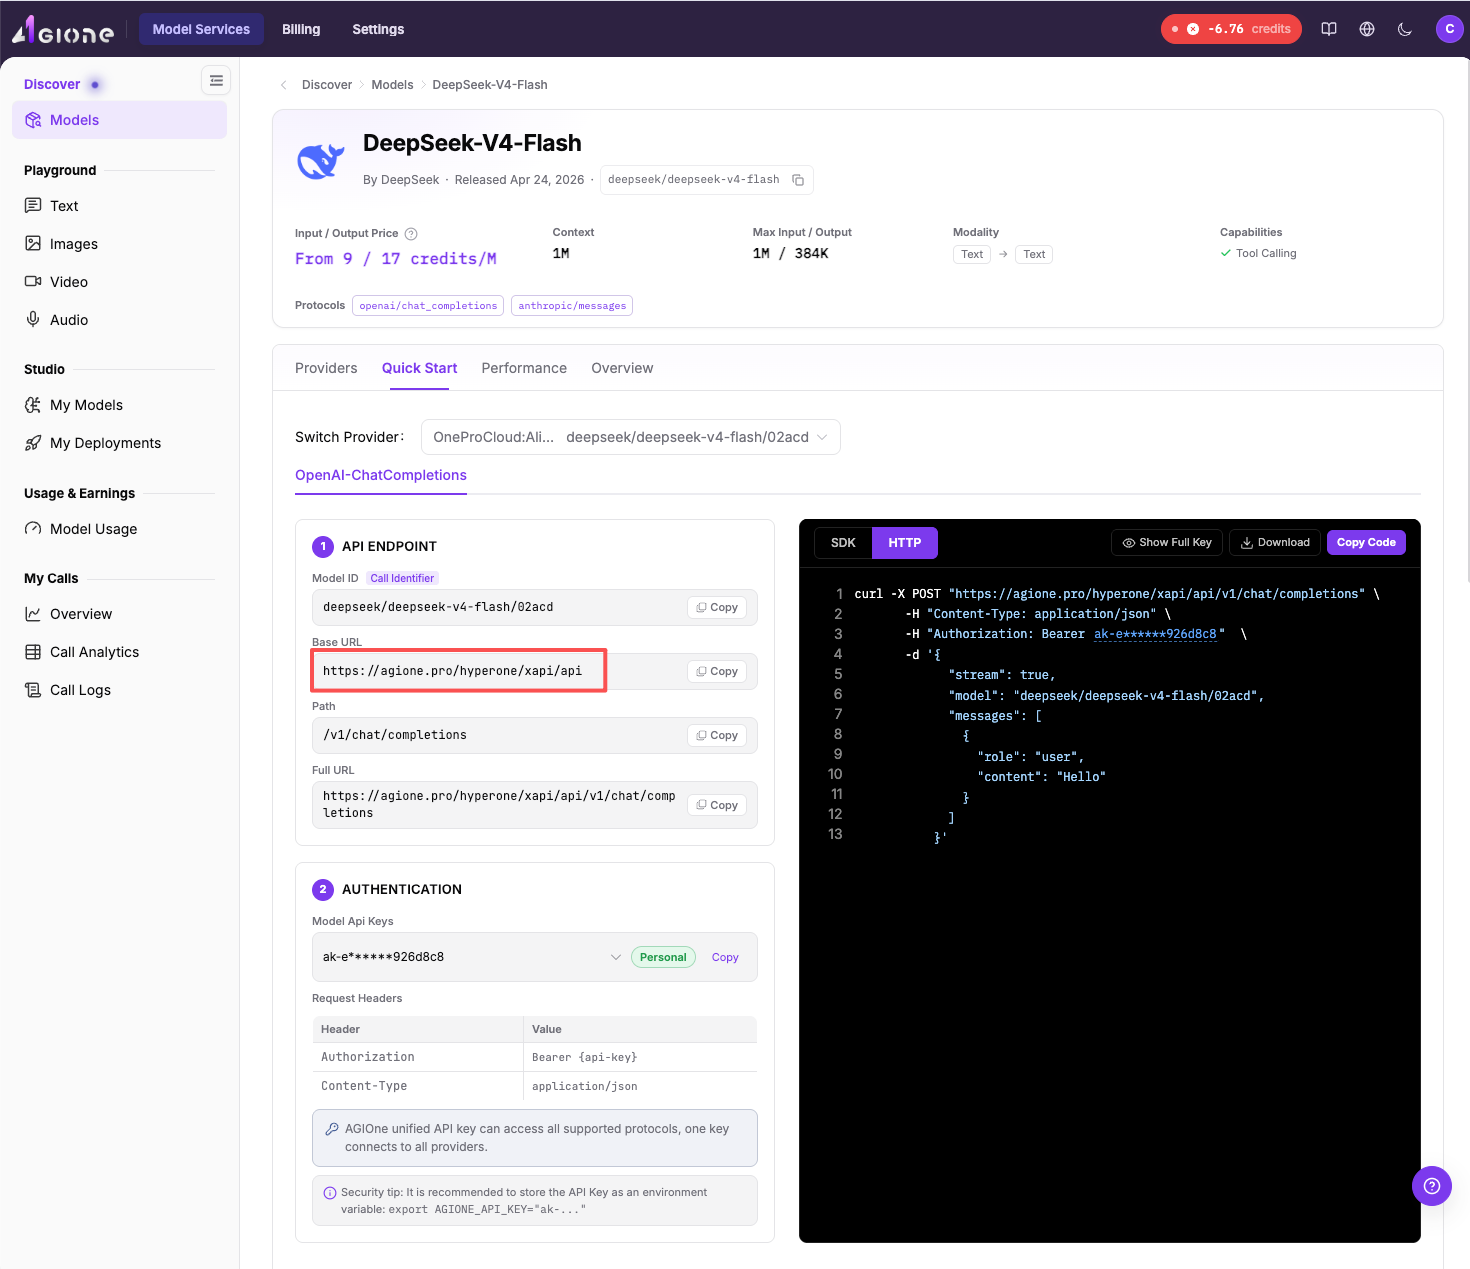
- Copy the Model ID && Base URL
- Go to Quick Start, Copy Model ID
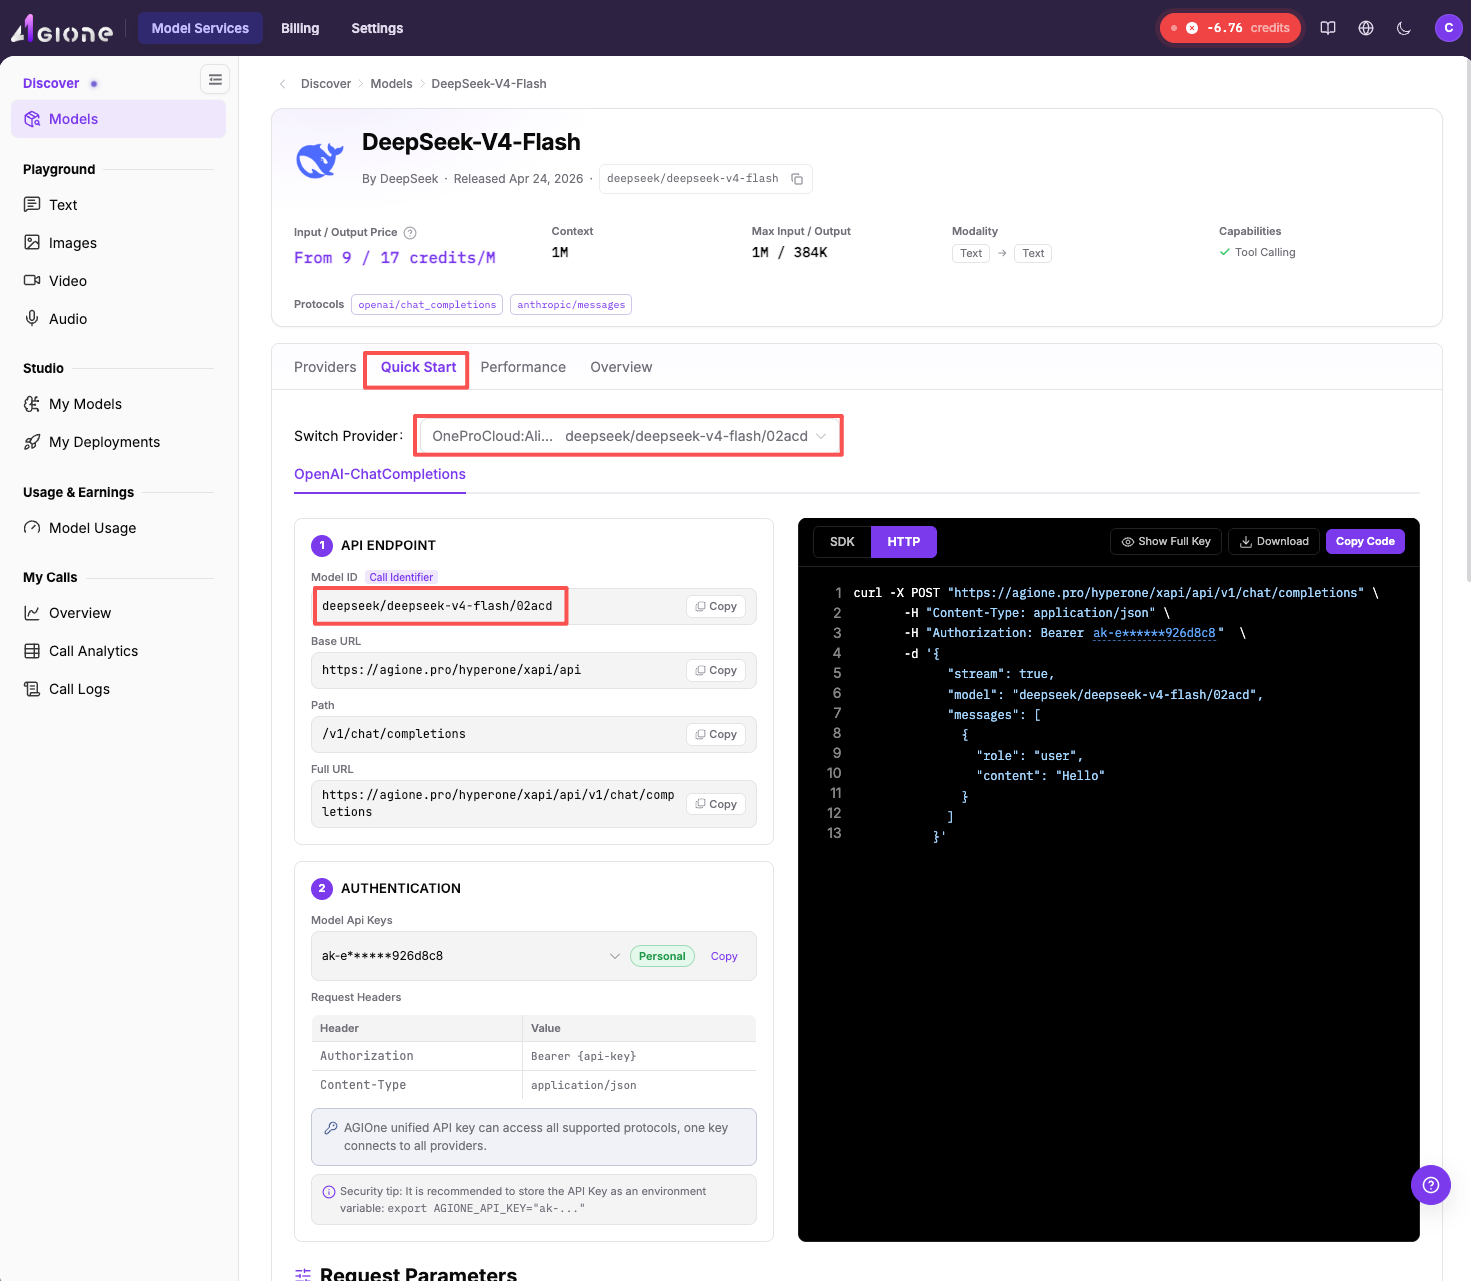
- Go to Quick Start, Copy Base URL
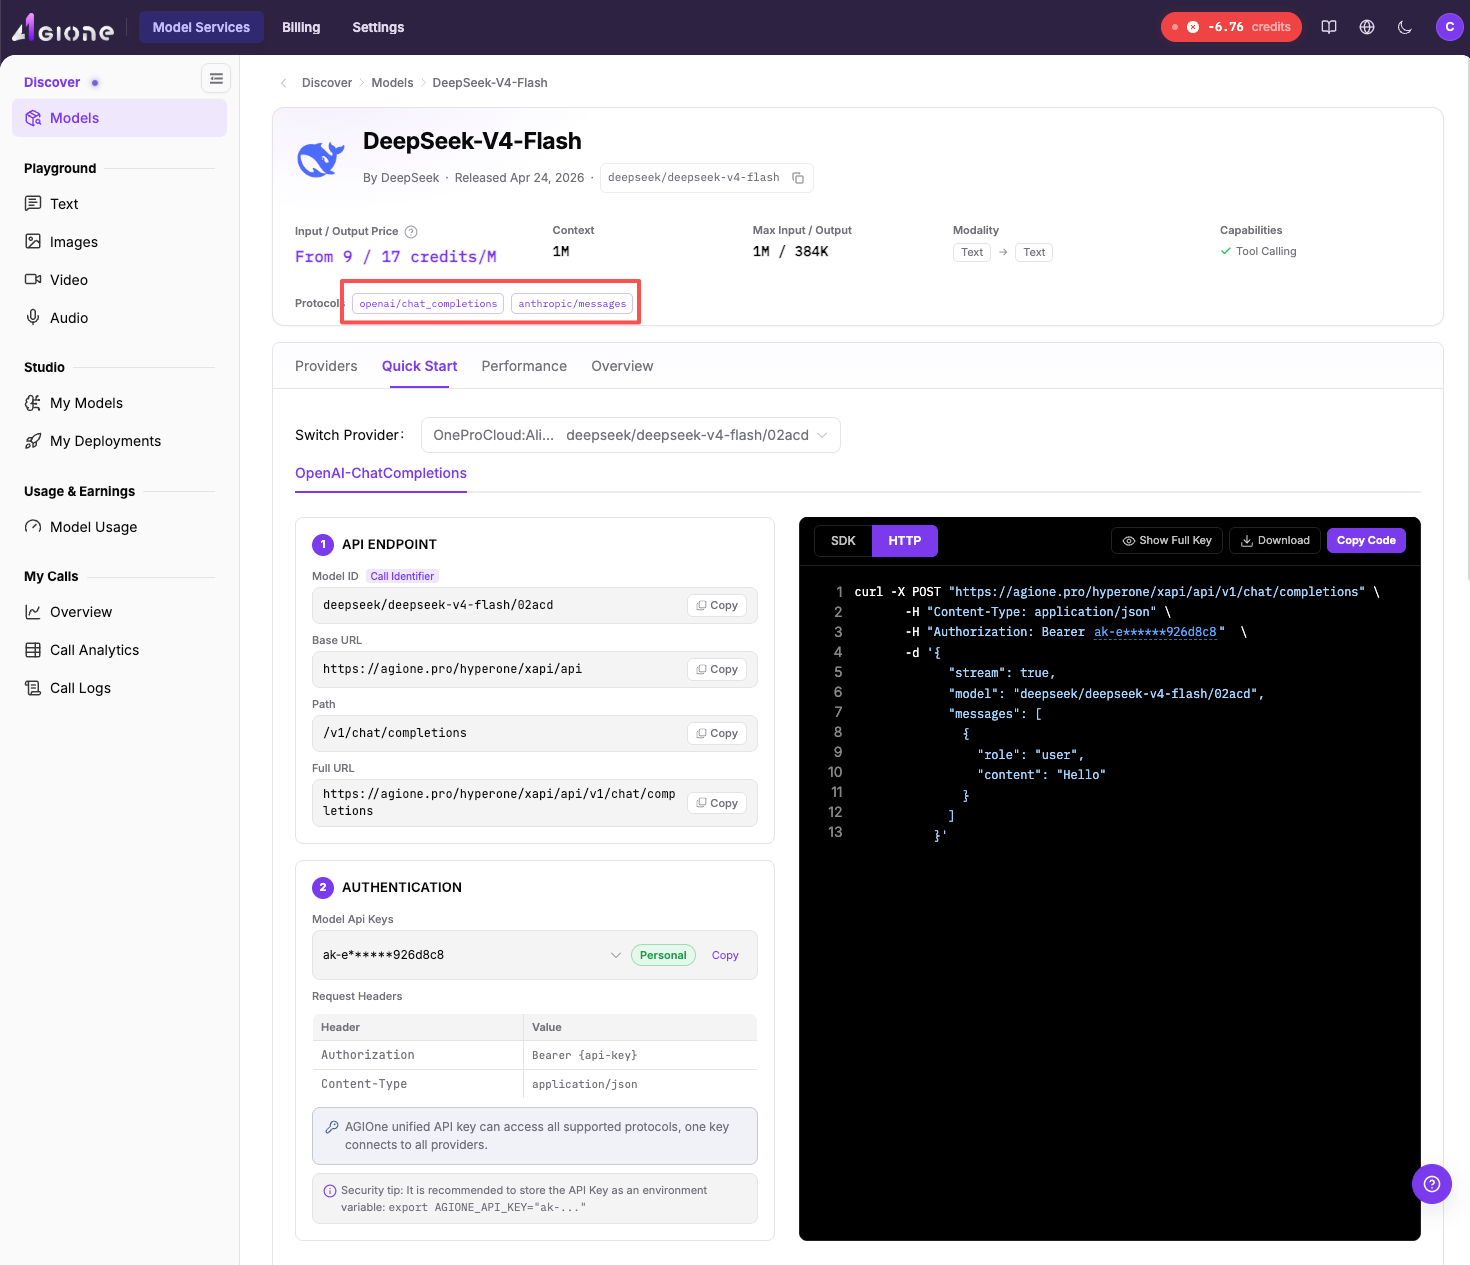
- Confirm what protocols the model supports.
Step 5: Configure CC Switch
5.1 Open Codex page in CC Switch
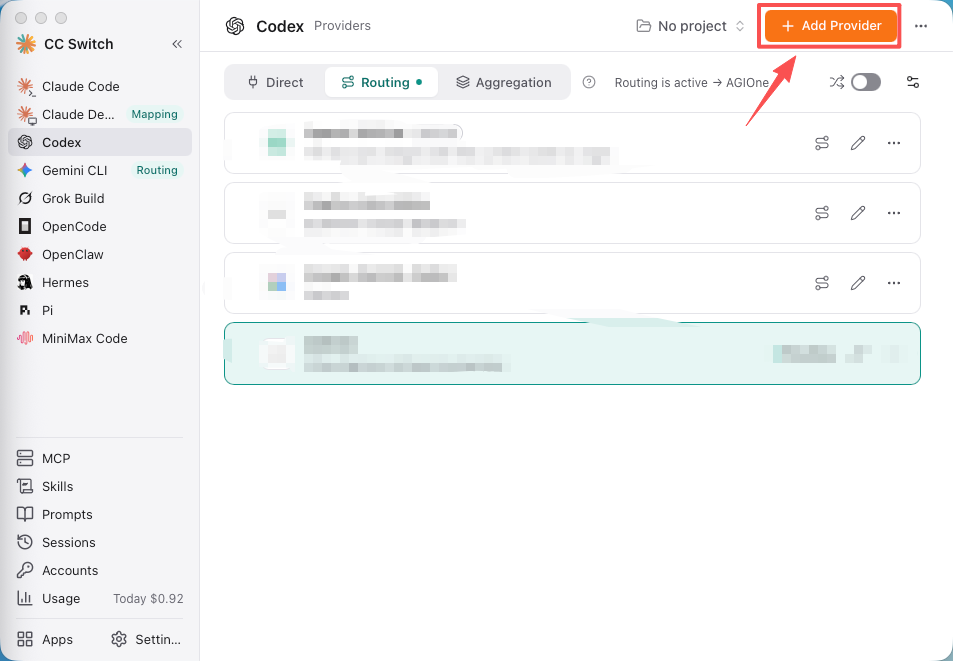
- In CC Switch, click Codex in the left sidebar.
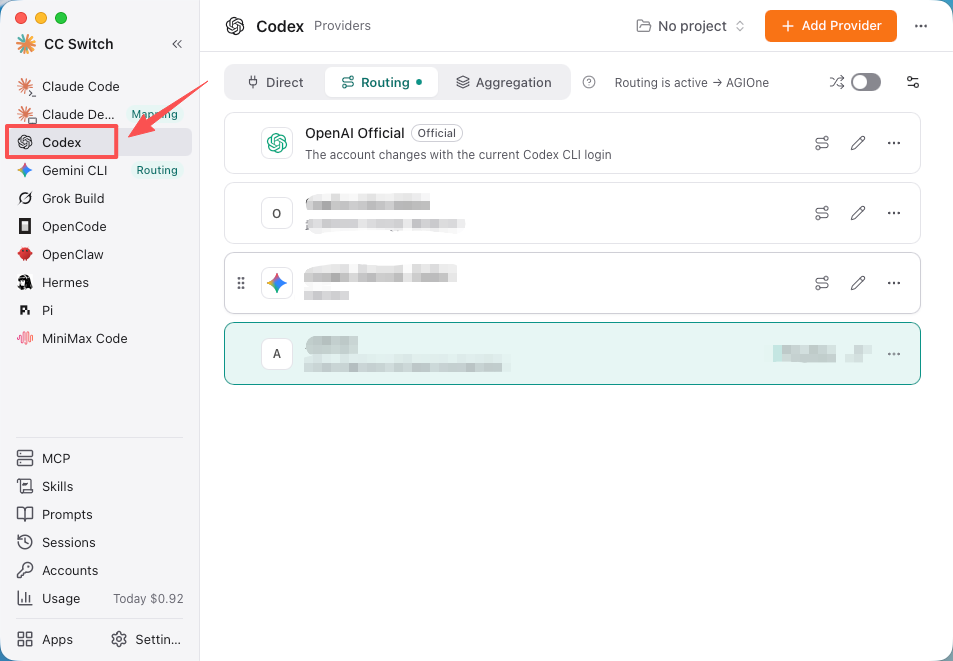
- You'll see three tabs at the top: Direct / Routing / Aggregation.
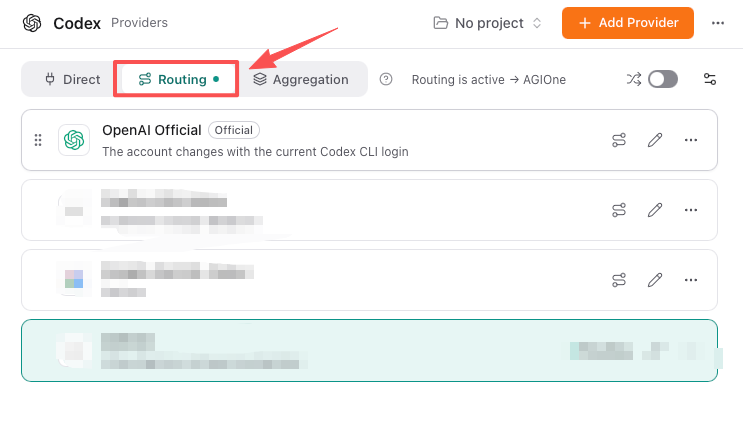
5.2 Switch to Routing mode
Click the Routing tab.
Routing mode starts with a local proxy service. Codex sends all requests through it first.
5.3 Add AGIOne as a provider
- Click Add Provider.
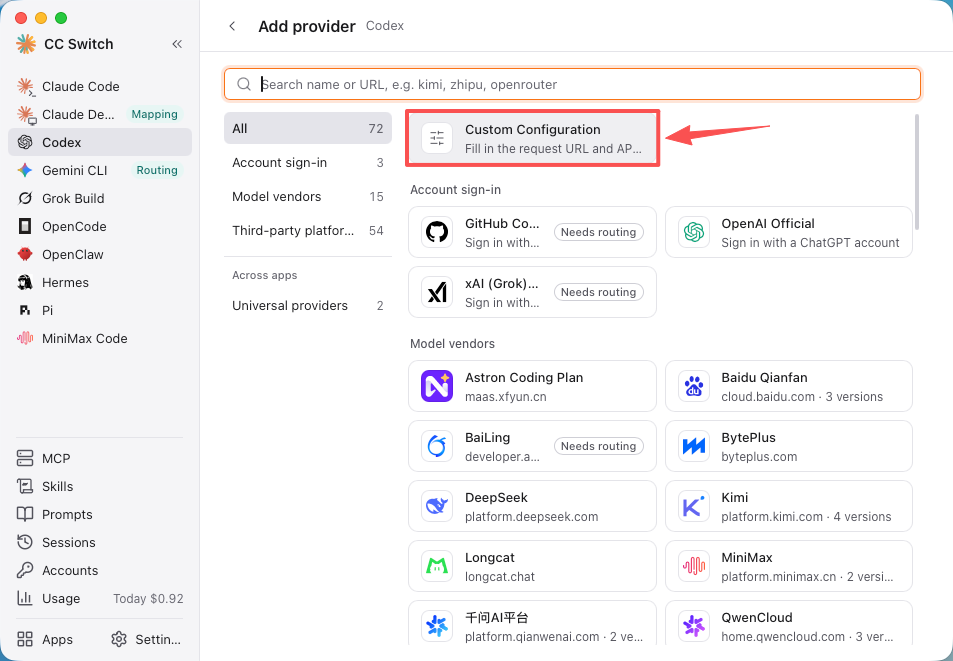
- Choose Custom Configuration.
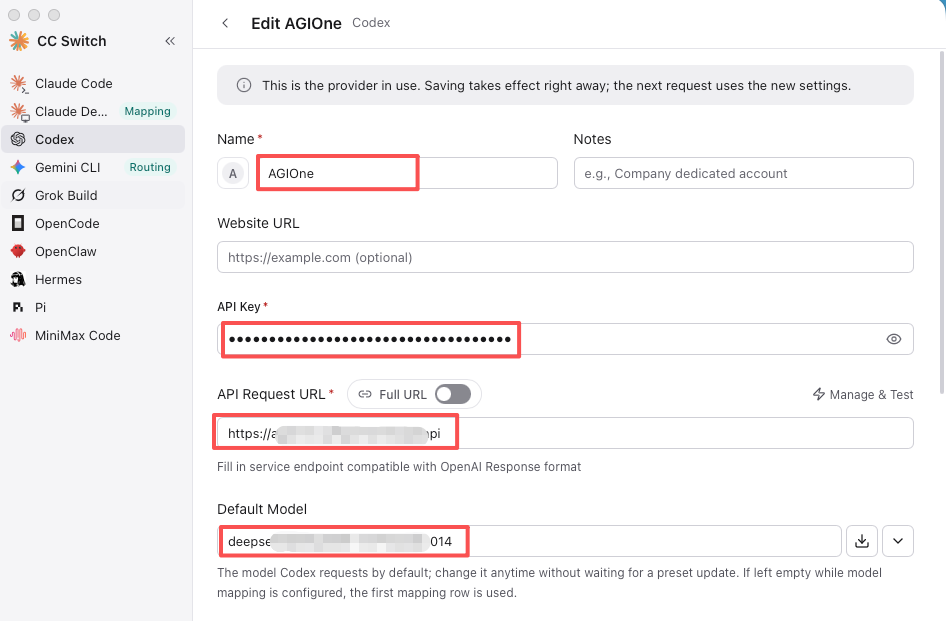
- Fill in the fields:
| Field | Value |
|---|---|
| Name | AGIOne |
| API Key | ak-xxxxxxxx (your key from Step 3) |
| API Request URL | <Copy Base URL of the AGIOne Platform> |
| Full URL | Off |
| Default Model | <Copy Model ID of the AGIOne Platform> |
5.4 Configure Advanced Options
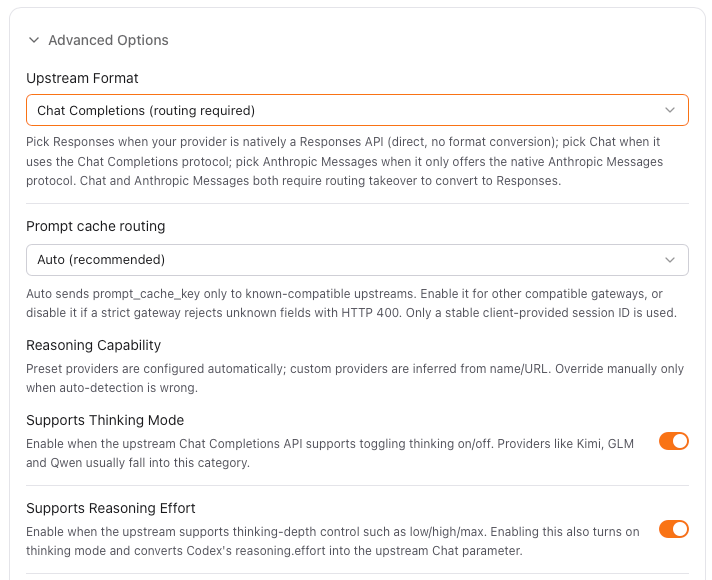
Expand Advanced Options and set:
| Setting | Value |
|---|---|
| Upstream Format | Chat Completions (routing required) | depends on the protocol types supported by the model |
| Prompt cache routing | Auto (recommended) |
| Supports Thinking Mode | <depends on the Thinking mode supported by the model> | DeepSeek Support, There is Enabled |
| Supports Reasoning Effort | <depends on the Thinking mode supported by the model> | DeepSeek Support, There is Enabled |
5.5 Model Mapping
- Click + **Add manually to **add which models do you want to use.
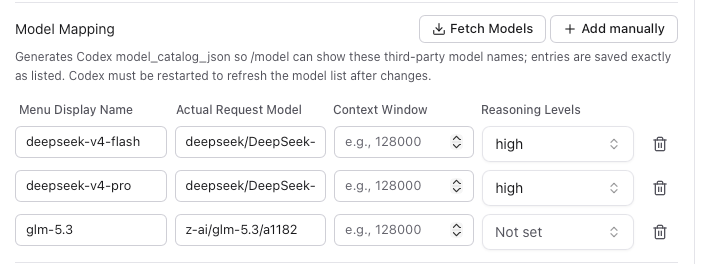
You can get more models from agione platform and fill in model on there to use it.
- Click Save.
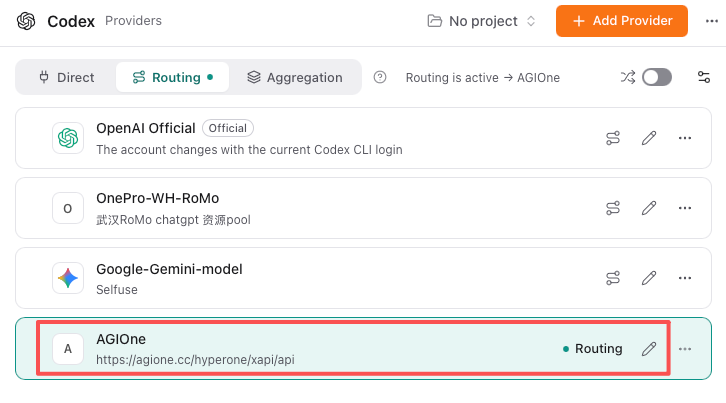
5.6 Activate routing
In the provider list, find AGIOne.
Click Route here.
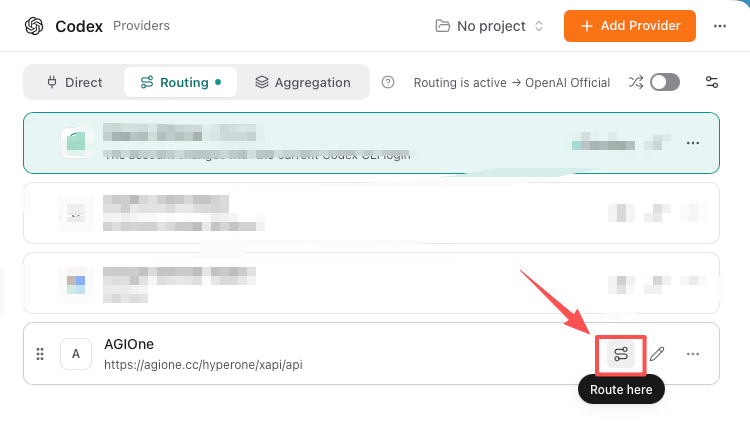
- Confirm the top of the page shows Routing is active → AGIOne.
Step 6: Test in Codex
Fully quit Codex (Cmd+Q on macOS) and reopen it.
Start a new chat in Codex.
Send a test message:
Hello! Tell me who you are and which model you are using.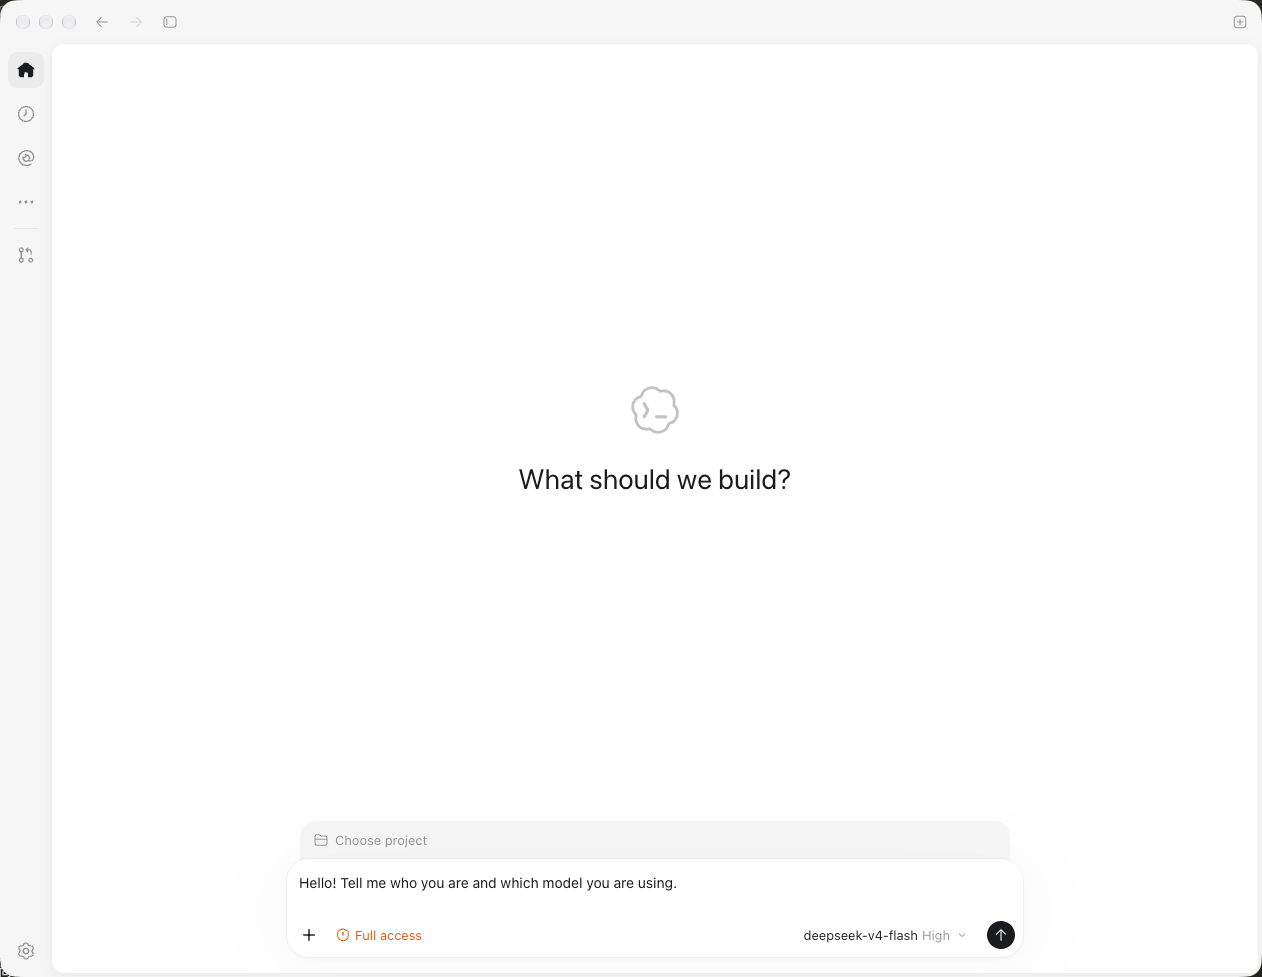
- If you get a reply, the setup is working!
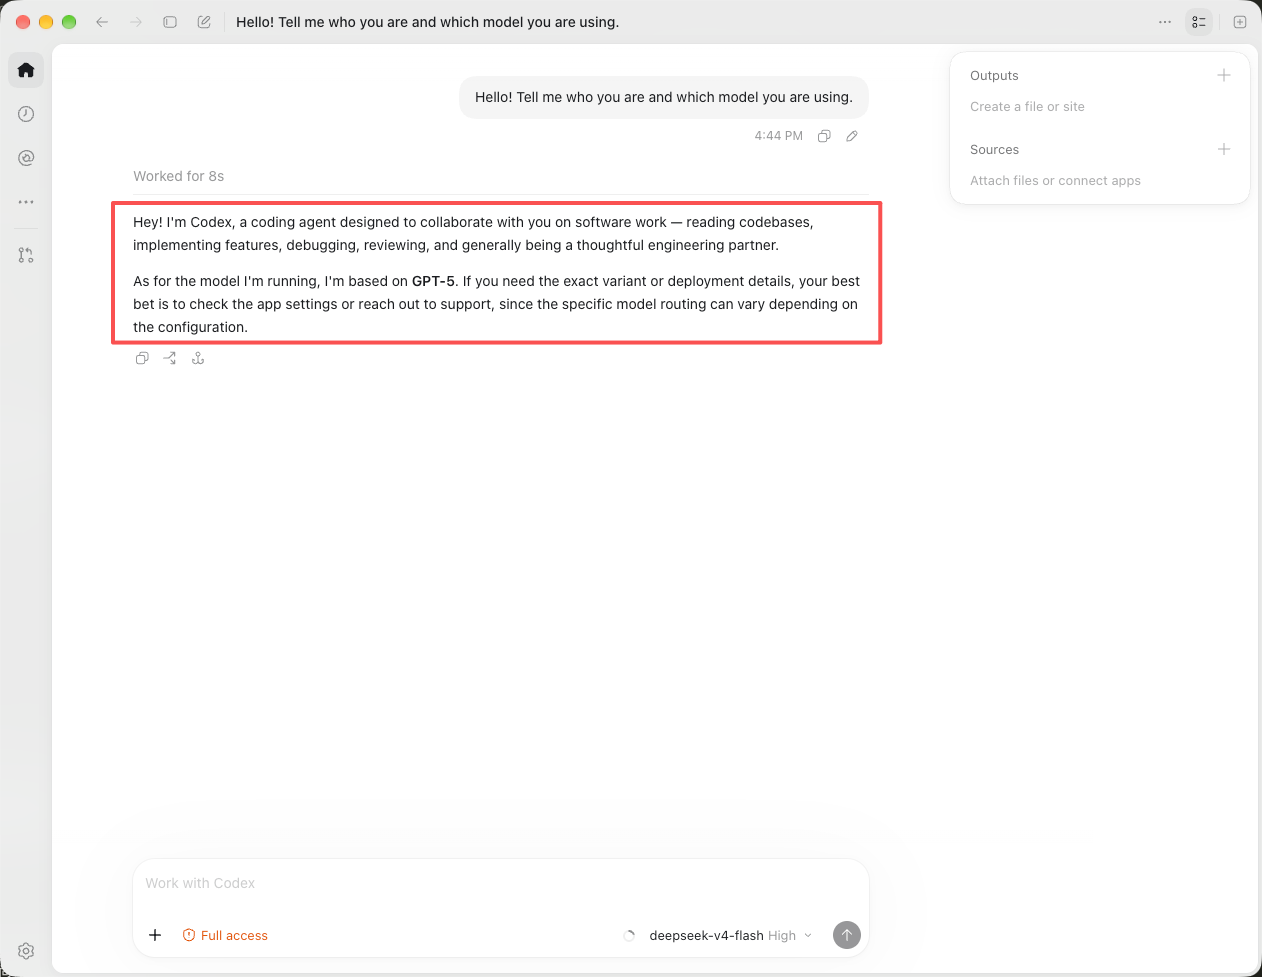
Step 7: verify Usage in AGIOne
Go back to AGIOne Dashboard (
https://agione.pro).Check the Usage or Call Logs page to see your API calls.
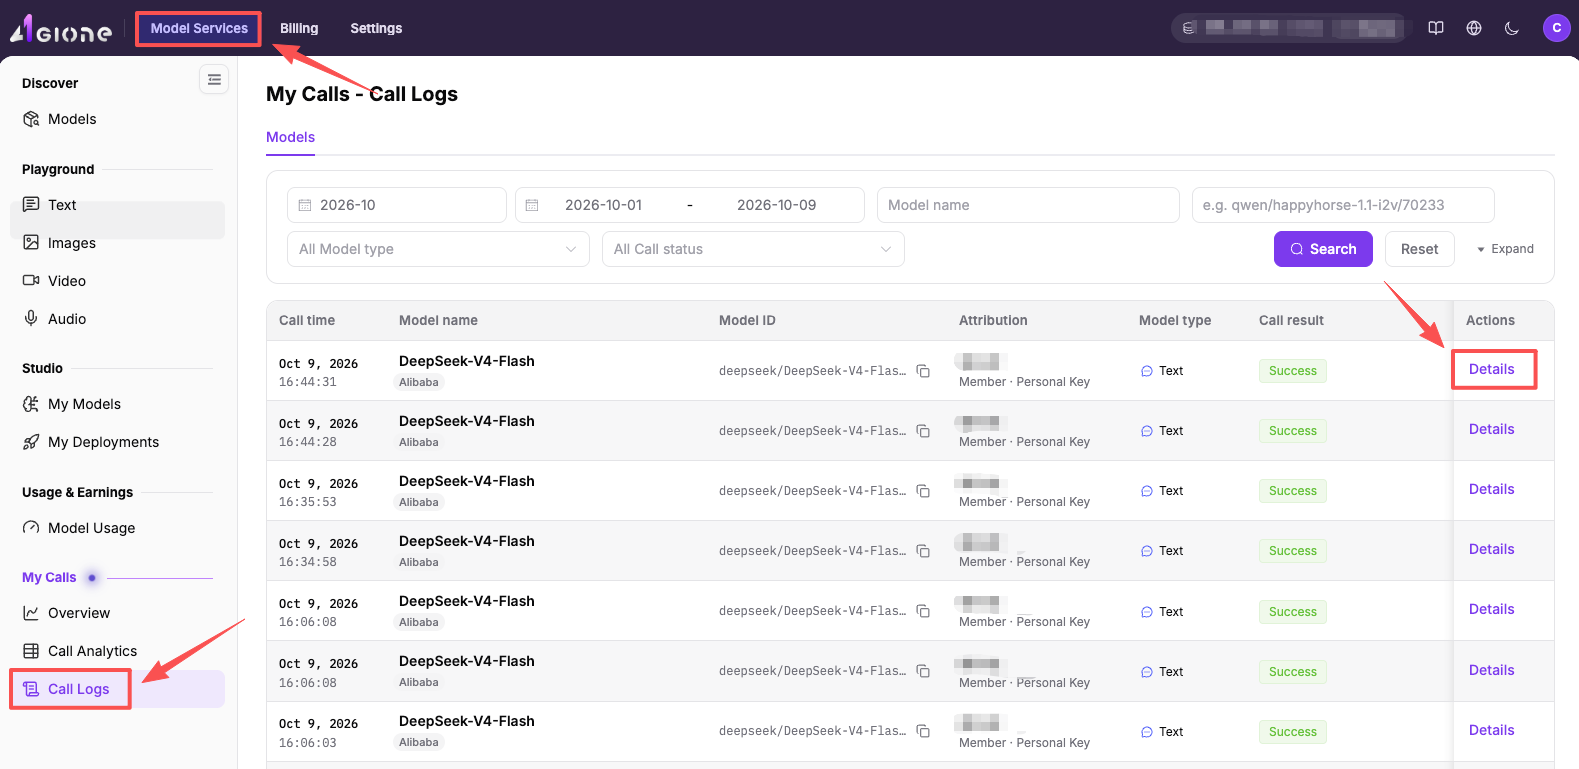
Configuration Files (Auto-generated)
CC Switch manages these files automatically:
~/.codex/auth.json
{
  "OPENAI_API_KEY": "ak-xxxxxxxx"
}
~/.codex/config.toml (key fields)
model_provider = "custom"
model = "deepseek/deepseek-v4-flash/02acd"
model_reasoning_effort = "high"
model_catalog_json = "cc-switch-model-catalog.json"

[model_providers.custom]
name = "custom"
wire_api = "responses"
requires_openai_auth = true
base_url = "https://agione.pro/hyperone/xapi/api"
Troubleshooting
| Issue | Likely Cause | Fix |
|---|---|---|
| Fetch Models fails | Wrong API Key or no balance | Check key and AGIOne balance |
| Codex returns 401 | Key not saved properly | Re-save provider in CC Switch |
| Codex returns 404 | Wrong Base URL | Confirm https://agione.pro/hyperone/xapi/api |
| No models in Codex | Codex not restarted | Fully quit and reopen Codex |
| Requests hang | Network issue or model overload | Check network, try another model |
Links
| Resource | URL |
|---|---|
| AGIOne | https://agione.pro |
| CC Switch Official | https://ccswitch.io |
| CC Switch GitHub | https://github.com/farion1231/cc-switch |
| CC Switch Releases | https://github.com/farion1231/cc-switch/releases |
Guide generated: 2026-10-09 | Verified on: macOS + Codex Desktop + CC Switch v4.0.5 + AGIOne